UV gel stickers—also called semi-cured gel nail wraps—have changed the way many people do their nails at home. They offer the glossy, chip-resistant finish of a salon gel manicure without the mess of painting layers of polish. They are thin, flexible, and pre-designed. But to get a flawless result, preparation and application matter. Here is how to use UV gel stickers correctly, including how to prep your nails with the band.
What Are UV Gel Stickers?
UV gel stickers are strips made from real gel polish that has been partially cured in the factory. This partial cure keeps them soft and pliable so they can stretch slightly and conform to the shape of your nail. Once applied, you cure them under a UV or LED lamp. The remaining gel hardens, bonding the sticker to your nail and creating a durable, high-shine finish.
Unlike traditional press-on nails, UV gel stickers are not plastic tips. They are thin gel layers that sit on top of your natural nail. They do not add significant length, but they add colour, shine, and protection. Most sets last 10 to 14 days with proper application. They are removed with cuticle oil or warm water, not acetone, making them gentler on the natural nail than gel polish.
Why Preparation Is Everything?
The number one reason UV gel stickers lift or peel early is poor preparation. Your natural nail plate carries oils, moisture, and invisible cuticle tissue. If these are not removed, the sticker cannot bond properly. It may look fine at first, but within a day or two, the edges will lift, and water will get underneath.
Proper preparation involves shaping the nail, pushing back the cuticle, lightly buffing the surface, and dehydrating the nail plate. Each step matters. Skipping the dehydrating step, for example, leaves a film of oil that prevents adhesion. Skipping the cuticle work leaves dead tissue that creates a gap at the base of the nail.
Key Steps for Nail Preparation
Start by removing any old polish. Wash your hands with soap and water, then dry them thoroughly. Shape your nails with a fine-grit file. File in one direction only—sawing back and forth creates micro-tears that lead to peeling.
Next, push back your cuticles. Soak your fingertips in warm water for a few minutes, or use a cuticle softener. Gently push the cuticle back with a wooden or rubber-tipped pusher. Do not cut living cuticle. Only trim loose, dead skin if necessary.
Then, lightly buff the nail surface. Use a fine buffer block or a fine-grit sanding band to remove the natural shine. You are not trying to thin the nail. You are creating a slightly textured surface for the sticker to grip. Two or three light passes are enough.
Finally, cleanse and dehydrate. Wipe each nail with a nail dehydrator or 91% isopropyl alcohol on a lint-free wipe. This removes oils, dust, and residue. After this step, do not touch your nails with your bare fingers. Natural oils transfer instantly and ruin adhesion.
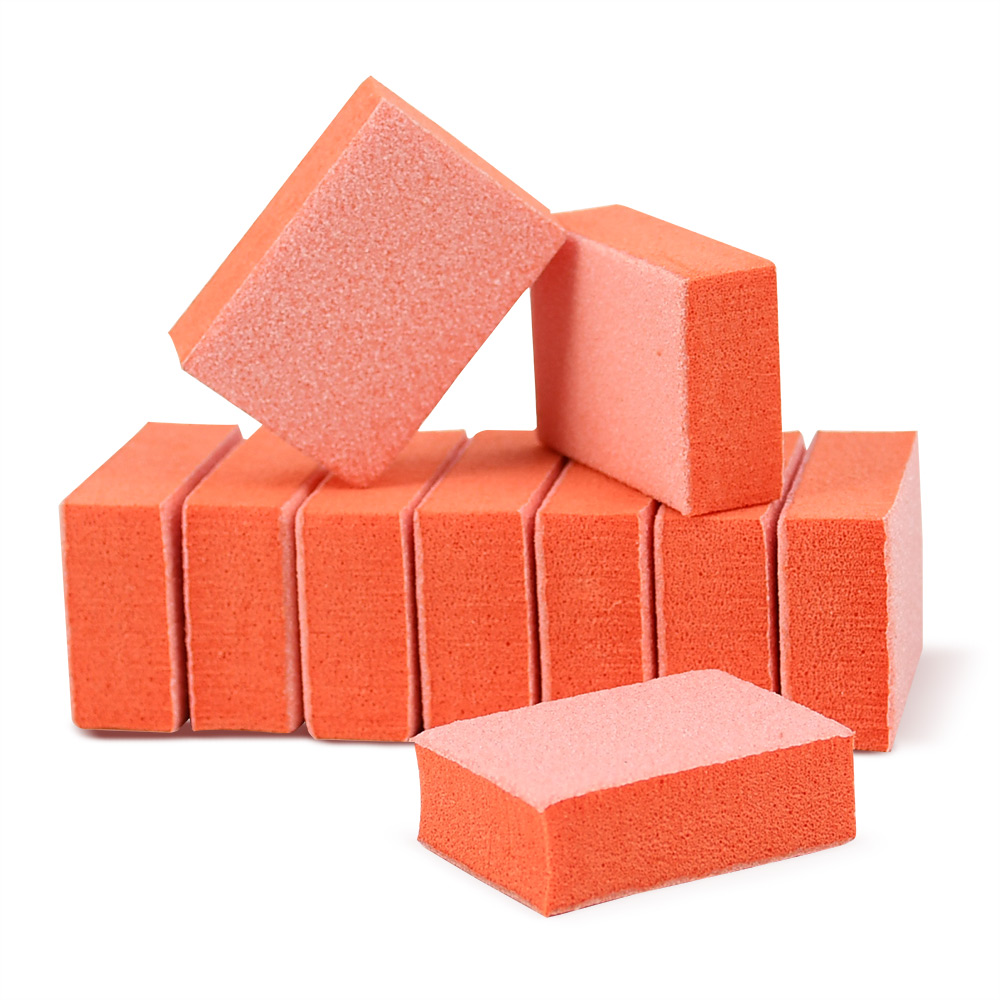
Using Mini Sanding Bands for Prep
Mini sanding bands are small abrasive sleeves that fit on an electric nail file. They are excellent for precision prep because their small diameter allows you to work around the cuticle and sidewalls without touching the skin. They are also disposable, which supports good hygiene.
To use a mini sanding band for nail prep, choose a fine grit—180 to 240. Set your e-file to a low speed, around 5,000 to 8,000 RPM. Hold the handpiece like a pencil and rest your pinky on the table for stability. Use light pressure. Keep the band moving at all times. Never hold it in one spot for more than a second.
Use the band to gently remove dead cuticle tissue from the nail plate. Work from the sidewall toward the center. Do not file the living skin around the nail. Do not press hard. The goal is to clean the nail plate and create a slightly textured surface, not to thin the nail. If you are not comfortable using an e-file, a fine hand buffer works just as well. Mini sanding bands are a tool for precision and efficiency, not a requirement.
After using the sanding band, brush away all dust. Then wipe with dehydrator. Your nails are now ready for the stickers.
How to Apply UV Gel Stickers Successfully?
Choose the right size. Hold each sticker over your nail without removing the backing. Pick the size that covers the nail from sidewall to sidewall without touching the skin. If you are between sizes, choose the smaller one. A sticker that overlaps the skin will lift. A sticker that is slightly small can be stretched gently during application.
Peel the sticker from the backing. Try not to touch the adhesive side. Place the rounded edge just above your cuticle, leaving a tiny gap—about one millimeter. Press down at the center first, then smooth outward toward the edges. Use a wooden stick to press the edges firmly and push out any air bubbles.
If the sticker extends past your free edge, fold it over the tip or trim it with small scissors. Then file downward in one direction to remove the excess and seal the edge. Do not saw back and forth.
Cure the sticker under your UV or LED lamp. Follow the manufacturer’s recommended time, usually 60 to 90 seconds. Make sure all five fingers are fully exposed to the light. For extra durability, apply a thin layer of gel top coat over the cured sticker and cure again for 30 to 60 seconds.
After curing, apply cuticle oil to hydrate the skin around the nails. Avoid water for at least one hour.
-1024x1024.jpg)
Tips for a Flawless Result
Work one nail at a time. Do not peel all the stickers at once. They can lose their tackiness if left out.
Do not stretch the sticker too much. A little stretch helps it conform to the nail. Over-stretching distorts the design and weakens the adhesive.
Keep the sticker off the skin. Any contact with the cuticle or sidewalls creates a lifting point.
Press the edges firmly. The edges are where lifting starts. Use a wooden stick to seal them down.
Cure fully. Under-cured gel feels soft and peels quickly. If the sticker still feels tacky after curing, give it more time.
Avoid water and heavy hand use for the first hour. This gives the adhesive time to set fully.
Common Mistakes to Avoid
Do not apply stickers to un-prepped nails. Oils and dust prevent bonding.
Do not use a coarse sanding band on natural nails. It thins the nail plate and causes damage.
Do not skip the dehydrating step. It is the most important part of prep.
Do not peel the stickers off dry. Always apply cuticle oil and lift gently with a wooden stick.
Do not cure with an incompatible lamp. Use a lamp that matches the sticker’s requirements.
The Bottom Line
UV gel stickers are a convenient, damage-free way to get a salon-quality gel manicure at home. The secret to success is preparation. Clean, shape, buff, and dehydrate the nail. Use mini sanding bands gently for precision prep. Apply the sticker smoothly, seal the edges, and cure fully. With a little care, your UV gel stickers will stay glossy and flawless for up to two weeks.
Read also: The Complete Guide to Press-On Nails: Why Choose Them, How to Reuse, and How to Make Them Last